Caladium Care Guide
About
Caladiums are bright and vibrant plants that offer a wonderful spectrum of vivid colours across many different types of cultivars. Traditionally used in outdoor gardening in warmer climates, Caladiums are formed from tuberous bulbs, which are used much in the same way as we plant other bulbs like daffodils, hyacinths and tulips here in the UK.
As outside plants, Caladiums are quite tame and easy to care for, mostly because they are naturally in a more comfortable environment but when brought inside as an indoor plant a little more care and concentration is needed to keep these plants looking at their best. This is mainly because it is difficult to recreate their natural habitat environment. Native to predominantly South America these flowering perennials love the heat. While they have naturalised in other parts of the world like India and some parts of Africa, they like to grow in open and spacious forest areas where they are used to a high level of humidity, dappled indirect light and a reasonable amount of shelter.
There are around a thousand cultivars of Caladium which all sit within the family Araceae. Cultivation of these gorgeously exotic plants has been going on for well over a hundred years across Europe, with a selection of several varieties being grown purely just for indoor ornamental use due to their bright and patterned displays of white, pink, red and subtle greens, stretched across broad heart-shaped leaves.
If you are looking for a highly rewarding plant to add to your indoor collection this has to be a top contender. While probably not best suited for the houseplant novice as care can sometimes prove a bit tricky, this plant can be a great introduction to slightly fussier plants.
Light
The light requirement can vary depending on the variety of plants, often the brighter the colour of the leaf the brighter indirect light it will require to keep its vivid foliage. But the overall level of light doesn’t need to be the brightest spot possible, they are happy with a bit more moderate light.
That being said they will appreciate a touch of direct early morning sun, this can help to supercharge the colour of the leaves. It’s best to keep in mind that these plants are forest dwellers and often live naturally in a spectrum of light conditions. But as always with these types of houseplants make sure to avoid direct sunlight as this will quickly scorch their delicate leaves.
Humidity
This part is crucial for keeping your Caladium happy. These plants like it humid and will ideally like to be kept at a constant humidity level of around 60-85% during the growing season. The reason why this is so important to Caladiums is that during their natural growth cycle in the tropical forests of South America, they will do all their serious foliage growth during the warm rainy season when humidity is at its peak. Understanding this natural habit will make caring for Caladiums much easier.
Pro Tip
The best way to maintain high humidity is to use a humidifier placed about a metre away from your plant to provide high ambient humidity. Alternatively, you could place your plant on an undertray filled with Leca pebbles sitting in a shallow layer of water. Make sure the plant is not submerged in any water as this can lead to root rot. As the water from the undertray evaporates from the surface of the pebbles or stones it will keep humidity levels high precisely where you need it most.
Water
Caladium sits comfortably in the middle of the watering spectrum. They like to have their soil kept slightly moist but not wet or soggy as this can lead to root rot and fungal infection. A continuous moist soil will be the ideal sweet spot. You should never allow the plant to fully dry out as this will tend to cause irreparable damage to the foliage.
It is also important to note that Caladiums will go dormant in the winter months, during this time they will need next to no water. When spring comes around a heavier watering should wake them from their dormancy and allow them to start shooting fresh growth.
Top Tip
Always water from the base of the plant. Sitting your plant in an under tray and allowing it to absorb water from the base will reduce the risk of overwatering and is a good preventative measure for fungus gnats. Remember to always set a timer from the minute the plant goes in the water, we don’t want any forgotten casualties on our hands.
Pro Tip
Before you water your plant, take note of the weight of the pot. Once you’ve watered the plant, try to notice the difference in weight from before. Now you can quickly tell if your plant needs water by just lifting it up
Soil
Caladium prefers well-drained soil that can retain moisture between watering. The ideal soil mix for Caladium will be nutrient-rich, allow for good aeration, be slightly acidic, and be free-draining with a smidge of water retention.
Most aroid potting mixes will be sufficient, but you can always add perlite for some additional drainage, and vermiculite for added water retention. With a combination of these, you can provide the best environment for your plant to thrive.
Pests & Diseases
It is good practice to regularly check your plants for any signs of aphids, red spider mites, mealy bugs, and thrips. You may notice some signs of distress and allow yourself time to prevent a full-blown attack.
The most common pests and problems that form with Caladium are aphids or mealybugs. Most of these issues stem from over or under-watering and lack of airflow.
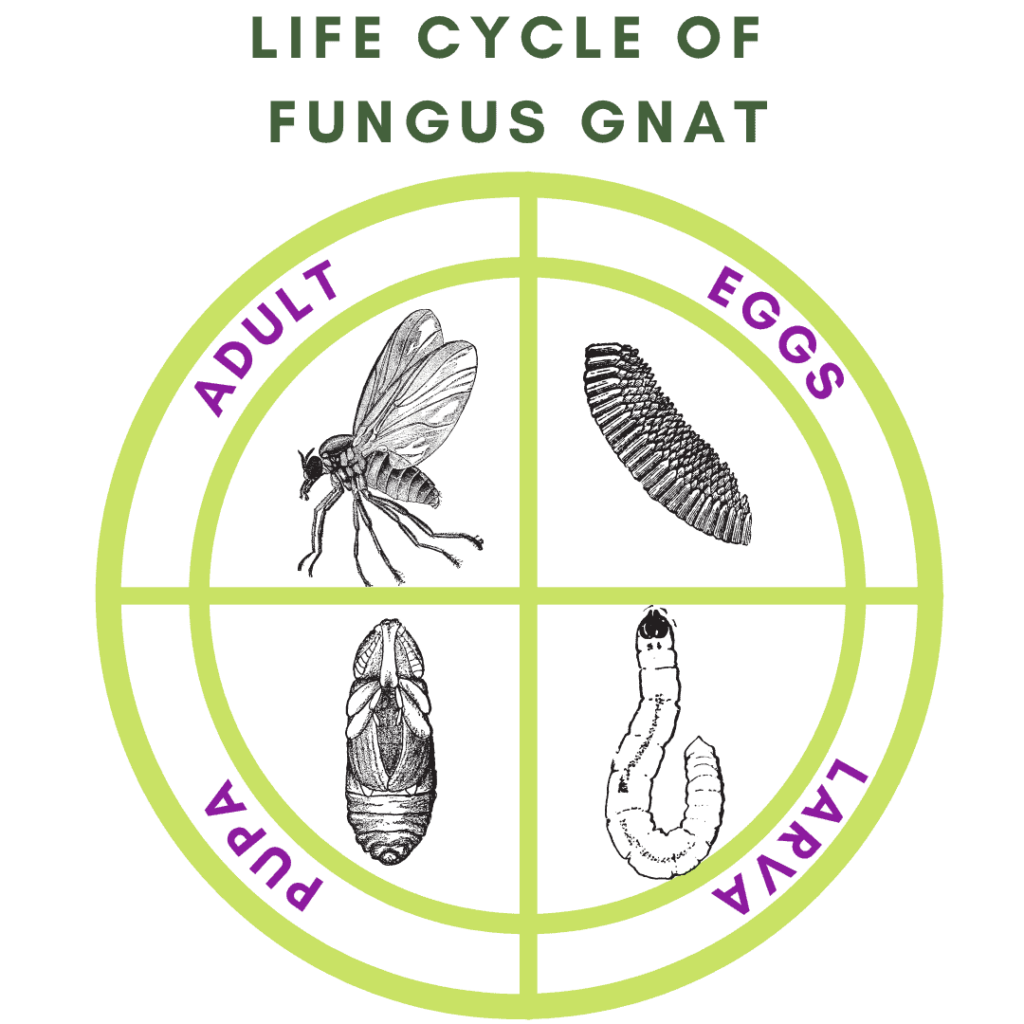
Check our video on homemade pest remedies or head over and read Fungus Gnat Fact Check and Home Remedies how to guide
Feed
Thriving plants will need regular feeding to keep the nutrients at optimal levels in the soil. Like most houseplants, to promote healthy roots stems, and leaves they will need a steady supply of nitrogen, phosphorus, and potassium. The most important is nitrogen to keep their leaves large and looking their best.
A good liquid houseplant feed can be applied every four weeks during the growing season. There’s no need to feed during the winter while the plant is dormant.
Top Tip
A drop of houseplant feed in a mister bottle is a great way to feed your Caladium via its foliage. This will help to enhance the look of their already stunning leaves!
Pruning & Propagating
The only real pruning that will need to be done with Caladiums is to remove damaged or dead leaves, besides that it always seems like a shame to trim anything more off.
REMEMBER – Always use clean and sharp pruning scissors!
Dividing
Caladium can be divided in a couple of ways if you have a larger plant with a substantial root ball this can be cut into pieces and repotted. Place the root ball on a flat surface and look for natural division points (these can be identified by how the stems are growing from the surface of the plant). Once you have identified your division points and assessed that each point contains a substantial amount of roots, using a sharp sterilised knife, cut through the root ball. Transplant each new division into an appropriately sized pot in fresh potting soil<insert link>
This can also be done with more mature Caladiums during the winter when the plants lie dormant. Remove the tubers from the soil and store them somewhere cool and dry until early spring. Then they can be cut into small tubers for planting. After being cut allow them to heal in the open air to callus over before potting into soil and watering.
Top Tip
Dividing plants can cause shock and be a traumatic experience for your plant. So make sure the plant is in good health and has been well watered the day before to give the plant the best chance of survival.
Repotting
It’s best to re-pot your Caladium once the roots fill their pot. Depending on the size of the plant, you may find yourself repotting once every other year. That being said, they don’t mind being pot-bound, they can survive like this for quite some time, as long as they are receiving enough nutrients via feeding.
The pot size can increase by one step up every year for as long as you have the space to house the new influx of growth. If you have reached your maximum pot size you will need to top-dress the plant once a year with a fresh layer of soil to replenish the nutrients.
The best time to repot your Caladium is when spring arrives. Outside temperatures will rise and the daylight hours will increase. When this happens your Caladium will react quickly to the environmental change and start producing lots of new foliage growth.
You will need to pick a pot with good drainage, we don’t want water hanging around the roots.
Next, fill a third of the way up with an Aroid Potting mix. Place the root ball of the plant in the centre of the pot.
When you’ve finished and got your plant back in the perfect spot you can give it a thorough watering to settle the plant into its new pot. Keep a close eye on it for the first couple of weeks and then relax back into your normal watering and feeding schedule.
Troubleshooting & Tips
- If your Caladium is becoming leggy and leaf growth is becoming stunted this is an indication that it isn’t getting enough light, it will be best to find a brighter location.
- If your plant is quickly developing yellow leaves including the newer growth this is an indicator of too much direct light, move it away from any area of direct light so it is only receiving high levels of ambient light.
- The sudden development of yellow leaves that quickly become brown or mushy can be a sign of overwatering which in most cases could also lead to root rot.
- If the edges of your plant are starting to become brown, this can be a sign of temperature shock, which can occur from sudden changes in ambient temperature or persistent cold drafts but can also develop if the plant is watered with cold water causing shock to the root system.
- If the tips of the leaves are starting to turn brown and slightly crispy this is a sign that the plant needs more humidity.
- If the edges of the leaves are turning brown and starting to curl inwards this is a sign that the plant isn’t getting enough water.
Toxicity
Caladiums are considered toxic and cause a great deal of discomfort is ingested by both humans and animals. It is best to keep it somewhere safe and out of reach of curious hands!
If you enjoyed this guide head over to Articles & Blogs to learn more or check out our YouTube for even more useful information!


