
Dieffenbachia Care Guide
Table of Content
- About
- Light
- Humidity
- Water
- Soil
- Pest & Diseases
- Feed
- Pruning & Propagating
- Repotting
- Troubleshooting & Tips
- Toxicity
- Species
- Dieffenbachia seguine
- Dieffenbachia ‘Camille’
About
Dieffenbachia is a lush and abundant herbaceous plant consisting of a straight stem with alternating leaves. The leaves are a lush deep green covered in pretty white spots giving it a simple yet beautiful look and making it a versatile option when choosing a houseplant. It has the wonderful ability to fit in and look good in almost all indoor settings.
Commonly known as Dumb cane, leopard lily or in some places mother in laws tongue. It has been given the former and the latter names due to its toxic sap that contains raphides which cause the temporary inability to speak. Dieffenbachia can be found growing in a broad area of the tropics from Mexico to Argentina and across the West Indies, almost all varieties of this plant are grown purely for ornamental use and have been for over two hundred years.
Belonging to the Araceae family, Dieffenbachia is the least fussy of the family amongst the other popular houseplant counterparts. It is a robust plant that is well-suited for beginners and houseplant neglecters alike. It is forgiving if water or two is missed and is quick to show if it’s not happy, but what makes it so well-suited is its ability to bounce back from the brink of death with little lasting damage.
With the capability of growing between two and a half to five feet high while staying compact and neat, Dieffenbachia is a charming plant to have in a home and can beautifully fill corners or larger spaces with ease, being a great interior design choice without fussy maintenance.
Light
Dieffenbachia thrives in bright indirect light but will also happily tolerate shadier areas of lower light. The less light the plant is exposed to the slower it will grow but if the light level is too low the white speckles on the leaves will start to fade and this is a sign that the plant should be moved to a brighter location.
The leaves of Dieffenbachia are very thin so any exposure to direct sunlight can quickly cause damage by burning and scorching the leaves.
Humidity
Another fantastic characteristic of these plants is that they will happily tolerate the average household humidity (40%). While they would be more comfortable if the humidity levels were slightly higher it is not essential to see your plant thrive.
During the winter months when the heating is on more frequently, moisture levels in the air are far lower, during this period it is advisable to give the plant a humidity boost and watch out for browning tips which will indicate the levels are too low.
Pro Tip
The best way to maintain high humidity is to use a humidifier placed about a metre away from your plant to provide high ambient humidity. Alternatively, you could place your plant on an undertray filled with Leca pebbles sitting in a shallow layer of water. Make sure the plant is not submerged in any water as this can lead to root rot. As the water from the undertray evaporates from the surface of the pebbles or stones it will keep humidity levels high precisely where you need it most.
Water
Watering is where it can all go wrong with Dieffenbachia with the most common killer of the plant being overwatering. They have a thin root system which can’t tolerate being wet for too long and if watered as part of a ‘once a week’ routine they will quickly start showing signs of distress. It is best to wait until you see a slight wilt in the leaves before watering again, this will help to prevent overwatering and generally keep the plant happy.
During the growing season and with larger specimens you might find watering a bit more frequent but always let the soil dry out by around 60-80% before watering again.
Top Tip
Always water from the base of the plant. Sitting your plant in an under tray and allowing it to absorb water from the base will reduce the risk of overwatering and is a good preventative measure for fungus gnats. Remember to always set a timer from the minute the plant goes in the water, we don’t want any forgotten casualties on our hands.
Pro Tip
Before you water your plant, take note of the weight of the pot. Once you’ve watered the plant, try to notice the difference in weight from before. Now you can quickly tell if your plant needs water by just lifting it up
Soil
Dieffenbachia prefers well-drained soil that can retain moisture between watering. The ideal soil mix for Dieffenbachia will be nutrient-rich, allow for good aeration, be slightly acidic, and free-draining with a smidge of water retention.
Most aroid potting mixes will be sufficient, but you can always add perlite for some additional drainage, and vermiculite for added water retention. With a combination of these, you can provide the best environment for your plant to thrive.
Pest & Diseases
It is good practice to regularly check your plants for any signs of aphids, red spider mites, mealy bugs, and thrips. You may notice some signs of distress and allow yourself time to prevent a full-blown attack.
The most common pests that are attracted to Dieffenbachia are spider mites which are often due to a lack of humidity.

Check our video on homemade pest remedies or head over and read are Fungus Gnat Fact Check
Feed
Thriving plants will need regular feeding to keep the nutrients at optimal levels in the soil. Like most houseplants, to promote healthy roots, stems, and leaves they will need a steady supply of nitrogen, phosphorus, and potassium. The most important is nitrogen to keep their leaves large and looking their best.
A good liquid houseplant feed can be applied every four weeks during the growing season. There’s no need to feed during the winter, light levels are much lower and the plant won’t use as much energy to grow.
Top Tip
A drop of houseplant feed in a mister bottle is a great way to feed your Dieffenbachia via its foliage. This will help to enhance the look of their already stunning leaves!
Pruning & Propagating
The only real pruning needed with Dieffenbachia is the removal of damaged or dead leaves, other than that the compact and neat growing form never tends to become unruly.
REMEMBER – Always use clean and sharp pruning scissors!
Dieffenbachia is a great plant to propagate as cuttings take easily and will start producing a new root system relatively quickly. There are two effective methods to start propagating from your plant.
Dividing – Dieffenbachia can be divided in a couple of ways if you have a larger plant with a substantial root ball this can be cut into pieces and repotted. Place the root ball on a flat surface and look for natural division points (these can be identified by how the stems are growing from the surface of the plant). Once you have identified your division points and assessed that each point contains a substantial amount of roots, using a sharp sterilised knife, cut through the root ball. Transplant each new division into an appropriately sized pot in fresh potting soil
These plants also produce baby plantlets which are easy to separate from the main root ball, they will need to be gently teased away, untangling and retaining as much of the root system as possible. Once you have removed all the plantlets place them into small containers with fresh potting soil
Top Tip – Dividing plants can cause shock and be a traumatic experience for your plant. So make sure the plant is in good health and has been well watered the day before to give the plant the best chance of survival
Cuttings – This method can be a bit tricky with Dieffenbachia and you often need a more mature plant to be able to take cutting successfully. Simply place your node cuttings in a glass of rainwater and wait for up to 2-4 weeks to start seeing signs of new roots. You will need to regularly change the water to avoid a build-up of algae. Once you have substantial root growth you can place the cutting into a small pot of Aroid mix.
You can also put your cutting straight into a jar with fresh sphagnum moss. This is probably the easiest way to propagate as it involves the least steps. Simply take your cutting at the node, find a jar or pot preferably with no drainage holes, fill it up with fresh moss and nestle your cutting in the centre. Fill up the jar with water so the moss has been evenly watered and then drain out all excess water making sure not to leave any at the bottom of the jar when standing upright. Now just keep an eye on your new cutting, checking the moss every couple of days to ensure it hasn’t dried out.
Repotting
It’s best to re-pot your Dieffenbachia once the roots fill their pot. Depending on the size of the plant, you may find yourself repotting once per year. That being said, they don’t mind being pot-bound, they can survive like this for quite some time as long as they are receiving enough nutrients via feeding and could happily be repotted every two to three years especially as they grow more mature.
The pot size can increase by one step up every year for as long as you have the space to house the new influx of growth. If you have reached your maximum pot size you will need to top-dress the plant once a year with a fresh layer of soil to replenish the nutrients.
The best time to repot your Dieffenbachia is when spring arrives. Outside temperatures will rise and the daylight hours will increase. When this happens your Dieffenbachia will react quickly to the environmental change and start producing lots of new foliage growth.
You will need to pick a pot with good drainage, we don’t want water hanging around the roots.
Next, fill a third of the way up with an Aroid mix. Place the root ball of the plant in the centre of the pot.
When you’ve finished and got your plant back in the perfect spot you can give it a thorough watering to settle the plant into its new pot. Keep a close eye on it for the first couple of weeks and then relax back into your normal watering and feeding schedule.
Troubleshooting & Tips
- If your Dieffenbachia is becoming leggy and leaf growth is becoming stunted this is an indication that it isn’t getting enough light, it will be best to find a brighter location.
- If your plant is quickly developing yellow leaves including the newer growth this is an indicator of too much direct light, move it away from any area of direct light so it is only receiving high levels of ambient light.
- The sudden development of yellow leaves that quickly become brown or mushy can be a sign of overwatering which in most cases could also lead to root rot.
- If the edges of your plant are starting to become brown, this can be a sign of temperature shock, which can occur from sudden changes in ambient temperature or persistent cold drafts but can also develop if the plant is watered with cold water causing shock to the root system.
- If the tips of the leaves are starting to turn brown and slightly crispy this is a sign that the plant needs more humidity.
- If the edges of the leaves are turning brown and starting to curl inwards this is a sign that the plant isn’t getting enough water.
Toxicity
Dieffenbachia is toxic to both animals and humans if ingested, this poses the most threat if the leaves of the plant are chewed. They have toxins that can cause intense numbing and irritation of the mouth, this can be easily treated with antihistamine but it is still worth moving the plant out of the reach of curious hands and paws.
Species
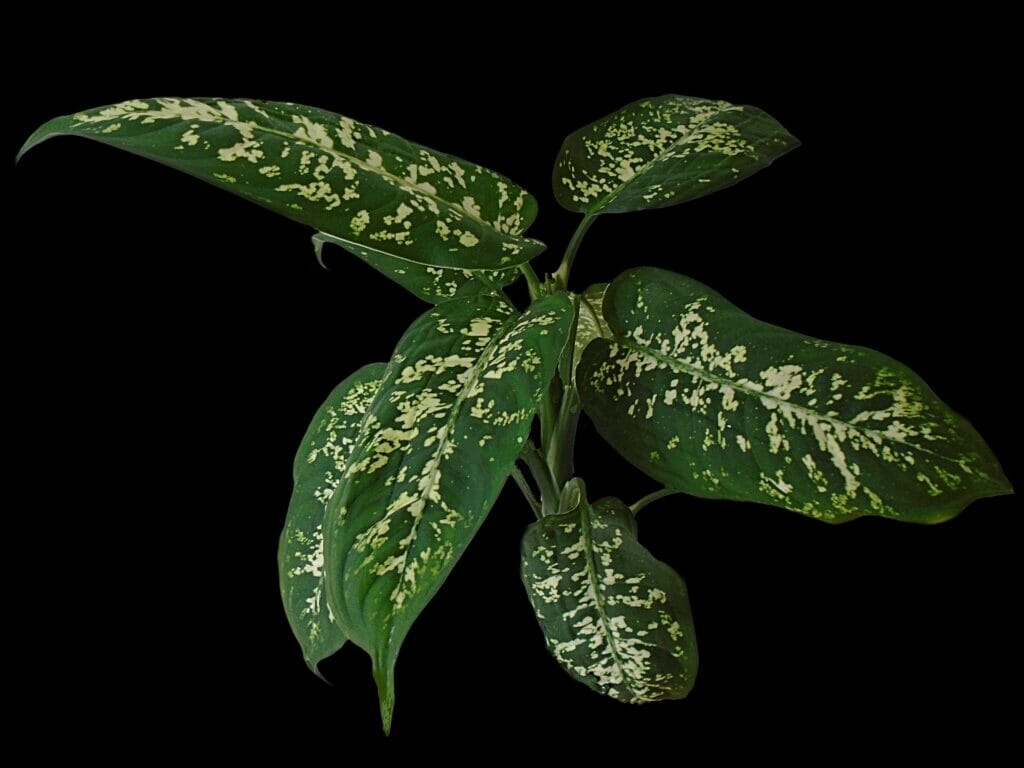
Dieffenbachia seguine
Dieffenbachia sanguine is a gorgeous tight cluster of large deep green ovate leaves. Growing in a compact upright fashion the broad leaves are covered in splashes of cream-coloured variegation.
Dieffenbachia ‘Camille’
Dieffenbachia ‘Camille’ is a striking variation of Dieffenbachia. At the same time, the plant’s growth habits and overall look tend to stay relatively similar across species. The variety produces large areas of variegation covering most of the leaf, giving it a brighter appearance. The slightly off-white variegation bleeds out towards the edge of the leaf from the centre.
If you enjoyed this guide head over to Articles & Blogs to learn more or check out our YouTube for even more useful information!